How to Install VMware VCenter 7.0 Step By Step(GUI)
- virtualgendham
- Nov 17, 2021
- 2 min read
Updated: Dec 7, 2021

The vCenter Server Appliance (VCSA 7) can be configured using a GUI and CLI methods.
The external Platform Services Controller (PSC) deployment model available in previous versions 6.x has been removed, only the embedded option is offered in vSphere 7, also vCenter Server on Windows has finally been deprecated, and all deployments must now use the vCenter Server Appliance (VCSA).
Download VMware vCenter Server Appliance ISO file from VMware web site: Download VMware vSphere
Pre-Requisites:
To deploy vCenter Server 7.0 appliance you need an ESXi host 6.5 or later, or on a vCenter Server instance 6.5 or later.
DNS entries(A and PTR records) for ESXi host and VCSA appliance
Clock must be synced on all hosts and appliances
The installer must be run from a machine with network connectivity to the ESXi host or vCenter Server where the new appliance will be deployed.
Installation Stage 1:
Mount the ISO image as a virtual DVD drive on your computer (desktop/laptop) from which you connect to ESXi hosts or extract contents of the ISO image to a custom directory.
Go to the vcsa-ui-installer\win32 directory on the mounted disk on windows machine and run installer.exe

Installer window launched, Click Install to set up a new vCenter Server.

Click NEXT to run Stage1 process

Check mark "I accept the terms of the license agreement" and Click NEXT
Furnish IP of the host where you want to install vCenter Appliance, the root password and click on NEXT

Accept the certificate warning and click on YES.
Supply a name for the vCenter Server VM and set the root password and click on NEXT.

Select your deployment type, Lab purpose I used Tiny and click on NEXT.

Select the datastore where the appliance will be deployed, choose thin provisioning if required(Lab purpose I used Thin Disk Mode), and click NEXT.

Provide the network settings to be applied to the appliance and click NEXT.

Review the summary page and click FINISH.

The appliance will now be deploying on the specified target ESXi host and you can view progress on the screen.
When Stage 1 is completed successfully, Click on CONTINUE to start the Stage 2 installation.

Click on the NEXT button to begin the second stage of the vCenter Server deployment process.

Select the time synchronization mode, Enable/Disable the SSH access, and click NEXT.

Select Create a new SSO domain, type the Single Sign-On domain name, password, confirm password, and click NEXT. (If you already have a SSO domain then you may use join an existing SSO domain for linked mode)

Configure the CEIP option if you wish to opt it and click NEXT.

Review the settings and click FINISH.

Click OK on the warning to continue.

You can monitor the progress and it will take about 20 minutes.

Once the setup is completed successfully, click on CLOSE.

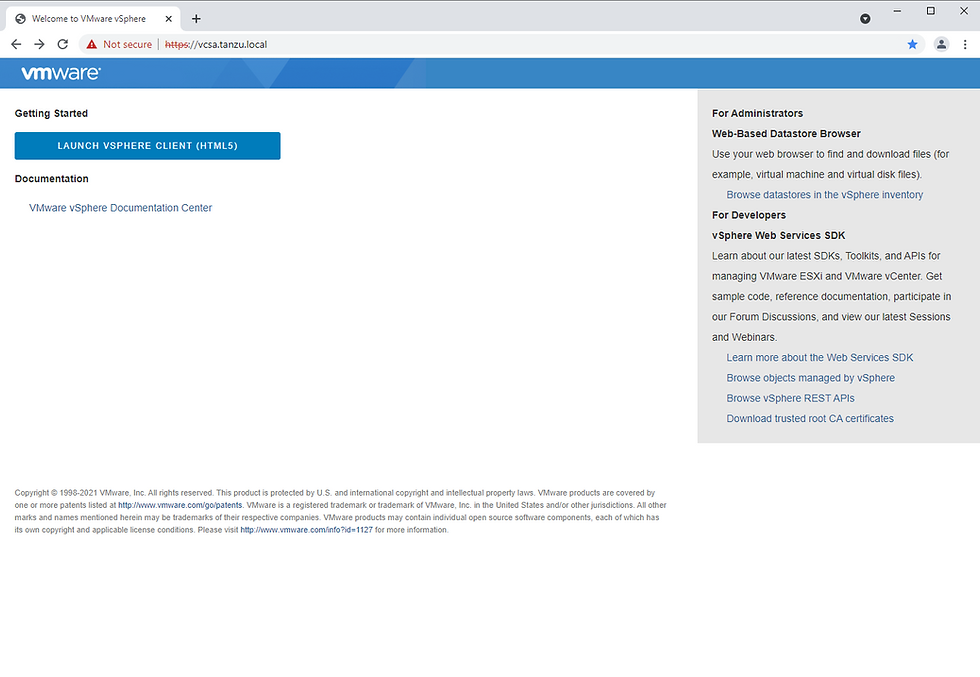
Enter the FQDN of your vCenter Server into the browser and click on LAUNCH VSPHERE CLIENT (HTML5).
Supply login credentials and click on LOGIN.

Now you can start creating Data Center, Cluster and adding the ESXi hosts and assign the licenses

Thanks for your time in reading the blog post, Happy Learning!!
Comments